dotty mermaid Mii Nail art tutorial

forgive me for a long pause, i’ve dwelling into some kind of procrastination world. but here i come with my a-week-every-month nail art that i’ve been doing and loving.

???????????????????????????????

i’m a super crafty and thrifty lady/girl, so if there’s a tiny bitsy beads that i could stick it to my nail without paying any cent, i will use it.

all you need is a tiny beads (info under), a base coat, a top coat, and a pin needle, and of course a crafty mind with buckets of patients.

???????????????????????????????

this is the beads that i’ve been talking about, when you fortunately have some payet (indonesian) or whatever you called it, you’ll find some round punch waste, and that’s what i used here. see how poor/stingy i am :p.

???????????????????????????????

after you coat your nail with base, coat the area that you desired to be decorated with top coat, and stick your beads to it. you can use the round end of a pin needle (with a lil touch of a top coat, to make the beads stick to it), or if u feel a lil fuzzy you can just stick a lot of beads to your finger and stamp it to your nail and then rearrange it well. it takes effort my dear, well meanwhile you can also practice your anger/patient management here :p.

???????????????????????????????

this how it should look like, when you do it in french manicure style like i do 🙂

nail art long short

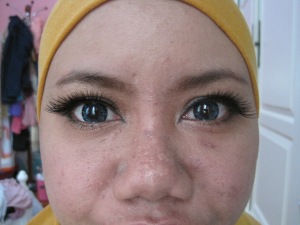
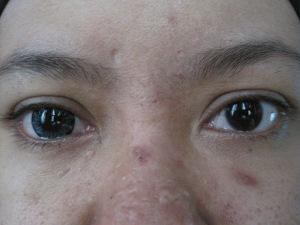
since i’ve been wearing a circle lenses lately, i must sacrifice my right index and thumb, and put my beads in different style in them. there are two different look, on short nails and on longer one. of course the longer the better.

???????????????????????????????

and don’t forget to layer them with loads of top coat, and double layer it after the first is drying. and layer it again with top coat after 3 days using (if you’re not getting bored :p). have fun with your super cute nails ladies!!

TonyMoly Red Appletox Honey cream Mii review

???????????????????????????????

i’m a bit infatuated by tonymoly since their green tea mask awe me so much, and now i got myself  a sample of red appletox, from the tox series. this sticky strechy cream are mainly purposed for moisturizing and bring resilience to the skin.

???????????????????????????????

it appears clear like gel, and very sticky like royal honey pot by skinfood but the smell is rather peachy (rather than apple, coz it’s reminds me of peach sake pore serum) and fresh with a hint of honey aroma, for the matter of smell i like it.

tonmol appltox bfore after forehead

i guess it doesn’t really looked different between before and after..haha 😀

tonmol appltox bfore after cheek

i’m a combination type, which sometimes really dry with so many oil, and don’t forget sensitive too, haha. after applying this sticky cream onto my face i felt it was shiny and somehow stay there with less absorption to my skin, but later i found that patting it helps to make it absorbed.  indeed it feel heavy, since i wear it before i go to sleep at first. but then the next time i use it as a base since i’m running out of my moisturizer, and voila i start to love it, somehow it works as a moisture locker for my skin and as an adhesive to my bb cream. and since then i start to use it as  base. but lately i change my bb cream from skin 79 hot pink to good afternoon tea by skinfood, and somehow the new bb cream is having it’s own load of shimmer, and i found it too shimmery if i used this appletox as base. so if u have the same kind of skin with me you might want to consider what bb cream you are using, it works better with bb cream or foundation that less shimery or even matte.

Gluey apple-honey cream with massage, Pack & moisture cream function. Sticky type (Stretches like honey), Improves skin texture to be smooth/ Silky Finish, Rich nutrients & supplement of moisture, Apple Extracts / Honey Extracts, Active Honey Complex (Black bee honey ,royal jelly extracts, honeycomb extracts)” -tonymoly-

The upcoming Eye make up tutorial by Mii

all 5 eyes


i’ve been collecting my eye makeup tutorial up to 5 different style, from casual to party look, from cute to fierce cute (still cute :p). well me no professional still ongoing learning and experimenting, so cmiiw and forgive my smudge and unbalance hehe…wait for all the tutorial ladies!

McDonalds shaker fries dan Manggo frizz Mii review

IMG_1222

Menjelang imlek Mcdonald’s seperti biasa bikin menu khusus, satu set minuman, burger dan kentang. aku nggak tertarik sama prosperity burgernya, tapi kepengeen banget nyobain mango fizz nya keliatannya seger banget gitu. setelah melewati drive thru routine akhirnya dapet juga minuman ama kentang ituh. mango fizz aroun 9 rebu dan shaker fries around 13 rebu.

IMG_1224

dari gambar promosi yang dipajang didepan resto, fries ini keliatan beda dan mengundang, kok ndilalah magic nya cuman sesachet bubuk penyedap blaah..pupus harapan2 indah aku. Berasa kayak gimana gitu nuang sachet ke kantong kertas coklat…kek sampah somehow. well benernya style DIY fries shaker gak baru sih di Mcd, tapi tetep..gambarnya gak bilang kalo begitu. oh well, kubuka lah itu sachet dan semerbak bau food additive yang nyegrak meruak, setelah kutuang sebagian ada sebuah memori aroma muncul…”anak emas…rasa keju…omaigatt!!”, bau dan rasa flavouring keju ini bener-bener sama persis sama jajanan pas sd keluaran indofood (jaman dulu kuanggep mewah dan mahal) berbentuk mi remes bermerk anak mas (any 80’s know this thing). Kalo balik ngomongin kentang nya sih..gak ada enak2nya, kering tapi gak kriuk, well to dry, i expect fries should crispy outside and still moist inside. cuman rasa keju anak emas itu yang sedikit membantu menghilangkan kekecewaan, bukan karna enak banget tapi ngangeni aja gitu.

IMG_1223

nah si mango frizz ini pada dasarnya soda + ice + mango syrup + nata de coco + mango jerky (manisan mangga). jadi rasanya bisa ketebak, dan sesuai pengarepan sih. menyegarkan pasti, apapun dgn soda dan es pasti berefek sama. tapi aku bukan biggest fansnya frill things yang numpuk dibawah, somehow gangguin kita nyeruput, suka nyangkut2 di sedotan dan pasti nyisa di bawah. nata de coco nya dipotong kecil2 dan tipis sih, tapi manisan mangga nya itu masih agak gede jadi ganggu, rasanya sih aku gak gitu suka, tapi kalo suka manisan mangga ya rasanya sama kayak gitu cuman ini kerendem air, definetely not my fancy.

pada akhir kata, aku sih gak bakal beli kentang itu lagi so 1 star out of 5

dan masih mikir2 kalo mau beli mango fizz, kalo kepengen banget aja beli. 3 stars out of 5 deh.

Maras Keripik singkong madura ;Mii Review

 IMG_1116

Hari ini dapet 3 bungkus gede keripik singkong Maras dari temen, secara aku penggemar keripik singkong, langsung aja aku buka deh, gak tanggung-tanggung tiga sekalian haha :D.

IMG_1108

Keripik singkong ini terdiri dari 3 varian, original, pedas manis, dan singkong kuning pedas manis. Ada beda jenis proses yang dipake dalam proses pembuatan keripik singkong madura biasa sama yang singkong kuning. kalau yang kuning itu kita sudah biasa nemuin, yaitu singkong dipotong tipis-tipis terus direndam dan digoreng, jadinya model kayak merek-merek yang sudah ada, sedangkan kalau yang singkong madura itu di rendamnya 30 jam (dibungkusnya ditulis begitu, bukannya aku yg pinter banget gituh..hehe ) jadi hasilnya lebih melembung (dikiit) dan renyah, renyah yang beda gitu.

Setelah cobain ketiga varian tadi, aku paling suka, cinta, dan gak bisa berhenti makan sama yang Original. Bukannya nggak suka pedes sih, tapi rasa sederhana dari asin, manis, dan bawang putih menurutku lebih dapet gitu di lidah. Dan memang dari lama aku suka keripik singkong style Madura, cuman yang ada di pasaran itu memanjang potongannya, jadi kadang suka kegedean dan keras, sedangkan kalo Maras punya nih bulat-bulat motongnya dan renyah banget. Sumpah bikin nagih, gak pake bohong deh hehe. Yang rasa pedas manis enak juga kok, cuman gak segitunya membuat aku ketagihan, tapi kalau kamu suka yang pedes-pedes-manis asik gitu sih oke banget deh.

Moga-moga di kasih lagi sama juragan keripik Maras nya ya…hehe

mau kasih 4,7 dari 5 bintang buat original-nya kalau yang lain 4 bintang aja yaa.. :p

Kalau ada yang tertarik bisa klik ke http://www.sodamara.com untuk keterangan lebih lanjut yaa..

Black Sugar mask wash off by skinfood Mii review

SF black sugar wash off

another sample sachet i bought from online for only Rp. 4.800 and it fill my little jar (approx 5 gr), more than enough for 3 months supply (at least for me)

IMG_0369

it comes in a dark brown color with a sugar granules, that somehow reminds me of a scrub, but in the ends i was sort of wrong.

how to use it:

1. wet your face (cleansed face) and apply an appropriate amounts (i only use around twice the amounts the spatula in the picture shown above), distribute evenly on your face

2. massage it around your face in a circular movements, and here the granules that at first feel rough start to melt out in our face.

3. leave to wait around 10-15 min and then wash it away.

enriched with minerals and vitamins, this face scrub effectively exfoliates dead skin that prevents make up while revitalizing skin -skinfood-

good points:

1. it really exfoliate my dead skin cell and tighten my pores, leave my skin moist and fresh.

2. it doesn’t have any hideous smell that linger or anything.

bad points:

1. after a while my dry prone area are getting dryer, just under my lips that is.

a tips fro my personal experience is just don’t use it to often, once or twice a week max, or you end up unsatisfied with the result.

i fall in love with skinfood this day, since i got all the awesome effect from any product i’ve tried, so you’ll gonna hear more ooowh and aaawh from me :p

i’d give you 4 stars out of 5 sugar dear!

royal honey mask by Skin Food Mii review

SF royal honey mask

i bought this sachet sample from pr3tty shop at tokopedia for only Rp. 4.500, it fill my tiny jar much. i’ve been using it around 4-5 times already and there’s still left for another 2-3 times more, with an adequate usage though.

royal honey closeup

it appears like a white-ish jelly, but surprisingly very sticky, like a honey. and it smell like honey (which i dont really fond of it).

IMG_0372

my camera couldn’t catch the stickiness somehow :p

how to use it:

1. cleans your face with your regular routine, then apply an adequate amount on your face (i found it a little less is better), apply it all over.

2. give a quick light massage around 10 seconds, and wait for 5-10 min

3. after waiting they should be watery (or oily for me) and then you can start to give a real circular heavy massage to your face, then the impurities and cellulose start to show up.

4. after massaging thoroughly and u feel like there’s no more dead skin to harvest, u can wipe your face with tissues and wash them away with water.

i like to wash it only with water and use it at night before i go to sleep, it did my face slightly oily (i’m a combination skin type) and sort of sticky feeling, but i bear it and then wash it properly with foaming wash at the morning, to get an extra refreshing and moist feeling in the morning. but if you had a super acne prone skin and have so many active acne i don’t recommend you to use it, but if it’s only one or two active acne you could avoid the area and cleans it with foam afterwards.

and exfoliating mask with royal black honey and royal jelly extract that slough away dead skin cells and transform rough skin into a nice honey-glazed complexion -skinfood-

good part:

i found it exfoliate my skin if i use it around a week to another using, even though some part of my face didn’t came up as tight and moist like other part. but i like this mask, it really made my pore tighter, healthier, and moist.

bad part:

i don’t like the honey smell personally, and how it made my skin a bit more oily (but with the nice result i could bear it, but still…no oily would be better)

apart from that i would love to buy another sachet (hehe, super thrifty me) and put it in a jar, for the same benefit with a cheaper price who could say no?!.

a sweet 4 stars out of 5 for you honey!

Mii review Newlook playful soft lenses -brown & grey-

IMG_0559

Newlook playful

diameter 14,2

BC: 8,6

43% water 57% polyhema

using period 3 months

price normal IDR 80.000

but i got it while on promotion buy 2 get 4 on optik Melawai, shared with my bff :p

IMG_0588

the brown accent color is very fade with a bold black limbal

IMG_0981 IMG_0982

so does the grey, you almost unable to see the accent color here.

IMG_0984

IMG_0988

(not a acne clinic before after kind of photo anyway :p, ignore my pimple)

this is how it looks on my right eye, i think it’s just slightly bigger than my real eyes, perfect for gothic look, or smokey eyes.


IMG_0991 IMG_0995

without flash it appears almost no different with my the brown one (under), my bff even say it looks a fade blue.

but with flash it looks so awesome, made me looks like a snake (haha) yet mysterious and fantastic:p

IMG_0552IMG_0558

the brown one somehow reminds me of a cat’s eyes, lovely and mellow. i’d like to accompany it with browney make up, or natural make up.

i dont really have any other comparison in the term of the color, but i found it wearable and some people didn’t notice that i’m wearing a soft lenses (brown one), but somehow i feel a bit tired using it, seems like my eyes nerves are working harder to see. but it feels comfortable, after a while it feels like i’m not using a lenses.

it comes in a jelly like state if i may say, rather than my first softlense (X2, zuhra) newlook comes thicker but somehow more gummy-er. i believe it’s related to the water content.

i think i’d give em 3,7 out of five for the tense feel on my eyes especially when i use it to work on my lappy, but out of that it feels comfortable, natural, and cheap enough for me.

Mii review on x2 Zuhra Blue softlenses

   IMG_0541

zuhra by X2

diameter : 14,5

45% polyhema, 55% water

best curve 8,6

6 month using period

price : IDR 65.000

IMG_0587

the design is pretty, detailed, with two color tone, blue on the accent and light black.

IMG_0530

the different is really visible between my real eyes, indeed created the bigger eyes effect.

IMG_0539

it’s pretty much blend into my eyes, they pretty much unnoticeable in normal light. since this is my first ever soft lenses, i still couldn’t judge whether it’s comfortable enough or no. bur after my 2-3 using it, i consider it comfortable enough, yet the diameter make it a bit harder to put in for first timer. since the water content is pretty high it comes thinner than other.

IMG_0729

this how i dress up in it, suitable for you who seeking for a cute looking eye like a deer, i would try other color and variant from X2 since it’s cheap and high in water content.

IMG_0810

this is my cousin wears it with flash.

i’d love to give 3,5 stars out of  5 just because the color is too ages ago…me actually want grey though.

mii Gyaru look make up tutorial

Image

all the material i used are mostly an old collection. they are accordingly :

1. skin food black egg pore gel base

2. Skin 79 hot pink  BB cream

3. oriflame dual skin corrector

4. marks powder in creme

5. palgantong theatrical powder in light beige

6. majolica majorca majolook eyeshadow palette in GR750

7. majolica majorca cheek customize in PK333

8. bourjois blush 32 ambre D’or

9. sariayu eyeshadow set in besure

10. daiso powder eyeshadow in chocolate

11. babor pencil eyeliner in black

12. wardah lipstick in rosemary 48

13. missha light lip gloss in BE003

14. beautistyle eyebrow pencil in brown 02

Image

pretty much bare face after my basic ritual cream by natasha then follow by skin food black egg pore gel base and then skin 79 bb cream hot pink, and not forget a bit of concealer. well my face i far from perfect as you can see, so no more explanation on that.

Image
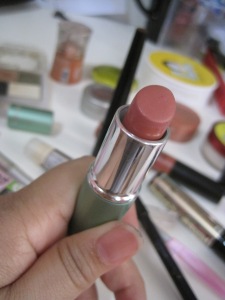
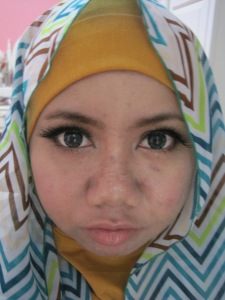
then i try to contour my chubby face area with warmer color blush (i dont have any bronzer or such)

Image

i used my fave shadow palette. 3 of their color are used here, cream, black and white eye 1

i apply the cream color eyeshadow on the entire eyes, also on my tear line and tighlighting under eyes.

Imageeye 2

then i apply dark brown on my crease, since this shadow isn’t sparkling enough, i add the bronze shadow from sariayu on top of  it lightly.


eye 3

they look  shinier than before right?

then i add the daiso chocolate shadow on the edge of my crease, and a bit on the middle of ma eyes. IMG_0648

eye 4

next is i apply some black shadow from my palette to the eye line tightly following my eyes wrinkle at the end of my eyes, and under my eyes only aroun 1/2 part, creating a triangle under my eyes corner (well a different in leg kind of triangle, or just call it a “V” shape) . and then the pencil eyeliner is following the same step eye 5 openIMG_0651

as you can see, here’s the important point of gyaru style eyelining, over the tear line a bit.IMG_0654

then i top my pencil eyeliner with liquid eyeliner, well it sounds a bit wacky, but since my liquid liner is about to die, so that’s what i do to resurrect the intensity, well you always can skip one of the part anyway. eye5

the eyeliner ritual result

falsies

applying falsie

now apply the falsies, here is another point to get an extra large eye look that gyaru breath on, and extra care on falsies. an additional of partial falsies giving you all the access to the total look. and also on the way you apply it, like what i’ve shown in the picture, i pull it a bit far from my real eyes end, it’ll giving you the bigger effect i believe.

but dont forget to curl your natural lashes first before apply falsies.eye 6

falsies checked!

IMG_0652

add a bit of pencil brow definer in a lighter color than your real color, because gyaru want to pop the eyes bigness nothing else.

IMG_0660

almost done..

IMG_0661

well i’m still on my long way to perfectness, so forgive my left eyes extra falsies dear..

IMG_0665

for the lips go as nude as you can get, here’s mine from wardah in rosemary.IMG_0671

and a neutral gloss on top and say “umma..umma”, and your done! get dress and pose!IMG_0680

here’s my signature pose (i’ve learn from ageha magazine)IMG_0686

another tip is use a circle soft lenses, a pink blush (that i couldnt  managed to put it in here), and a eyeliner tightlining under your upper eyes, would do the cherry on top on this look. good luck with your gyaru look dear!

IMG_0729 IMG_0744 IMG_0711 IMG_0718 IMG_0724 IMG_0688 IMG_0701 IMG_0707 IMG_0763 IMG_0768

  *i’ll review my circle lenses on my next post.